
Green Manure Crops: The Plow-Under Secret
Before the first bag of synthetic nitrogen ever hit a farm store shelf, farmers were already solving the soil fertility problem — and they were doing it with plants. Green manure crops are one of the oldest tricks in the agricultural playbook, and somehow, most modern gardeners have never heard of them. If you’ve been spending money on bagged amendments every season and still struggling with tired, compacted soil, this post is for you.
What Are Green Manure Crops, Exactly?
A green manure crop is any plant you grow specifically to chop down and dig into the soil while it’s still green and growing. You’re not harvesting it for food. You’re using the plant itself as living fertilizer.
This is different from simply composting. Instead of hauling material to a pile and waiting months, you grow the organic matter in place and bury it directly. The result? Fresh, nitrogen-rich plant tissue decomposes right in your garden bed, feeding the soil ecosystem exactly where you need it.
Farmers used this method for centuries before chemical inputs existed. It’s not a fringe idea. It’s the foundation that productive soils were built on.
If you’re still learning to read what your soil is telling you, check out Soil Sense Without the Lab: Read Your Dirt, Fix It Fast — understanding your starting point makes green manuring even more effective.
Why Green Manure Outperforms Most Store-Bought Soil Conditioners
Here’s the honest truth about bagged fertilizers: they feed plants, but they don’t always feed the soil. There’s a difference.
When you add synthetic nitrogen, you’re essentially spoon-feeding your crops while bypassing the microbial networks that make soil truly alive. Over time, this actually degrades soil structure.
Green manure crops work differently. They add:
- Organic matter that improves soil texture and water retention
- Biologically fixed nitrogen from legume root nodules
- Root channels that break up compaction
- Living food for earthworms, fungi, and beneficial bacteria
- A protective canopy that suppresses weeds between main crops
You’re not just adding nutrients. You’re rebuilding the entire system that makes nutrients available. That’s something a bag of granules simply can’t do.
The Best Plants to Use as Green Manures
Not every plant makes a good green manure. The best ones are fast-growing, nitrogen-rich, and easy to incorporate into the soil. Here’s what to reach for first.
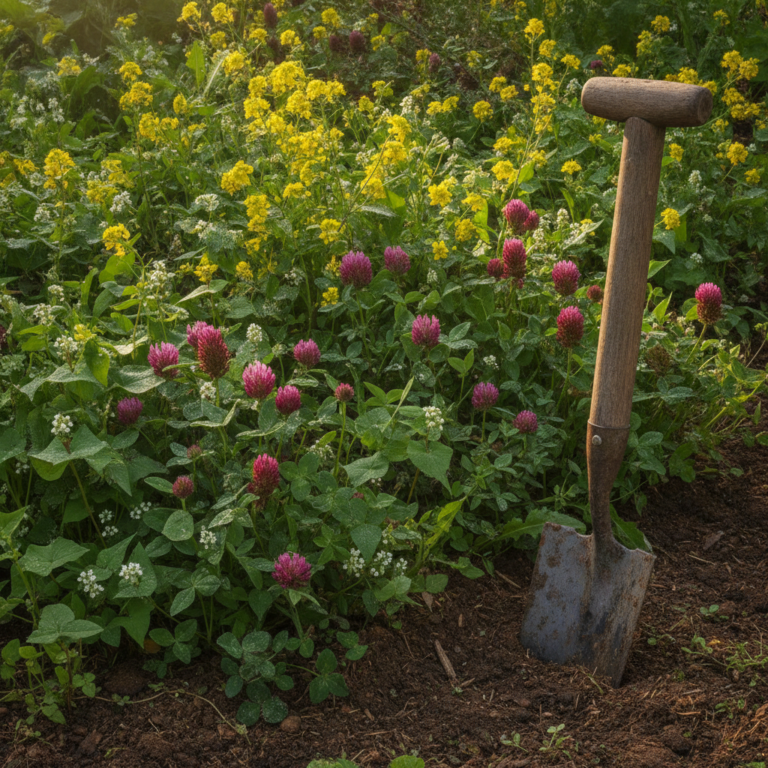
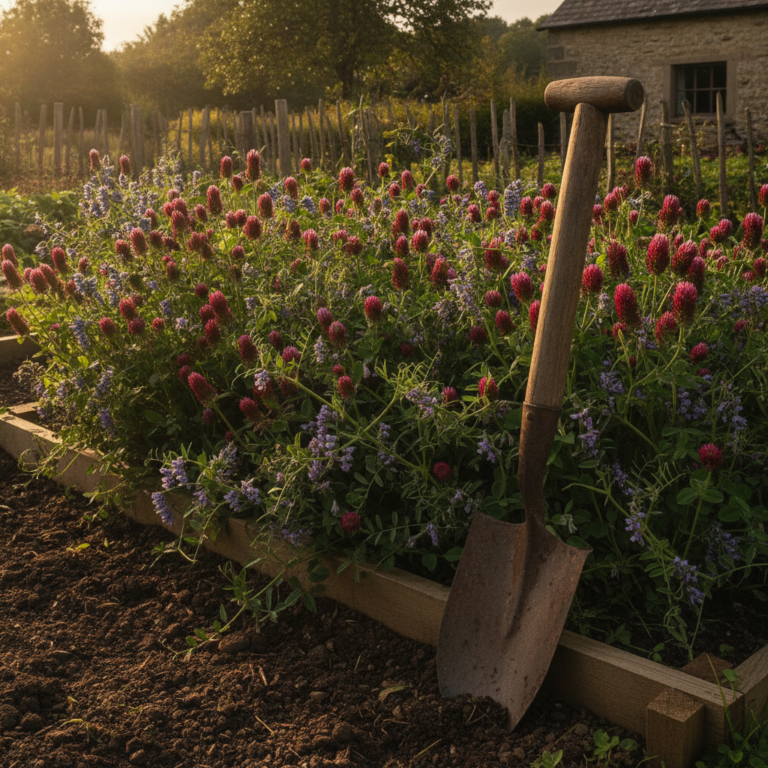
Legumes: The Nitrogen Fixers
Legumes are the gold standard. Their roots host bacteria called rhizobia, which pull nitrogen directly from the air and convert it into a form plants can use. When you plow them under, all that stored nitrogen releases into the soil.
Best legume green manures:
- Crimson clover — Fast-growing, beautiful, beloved by pollinators before you cut it
- Hairy vetch — Hardy, aggressive grower; excellent for fall planting
- Field peas — Easy to grow, great for spring or fall gaps
- Fava beans — Deep roots break compaction and fix heavy nitrogen
- Cowpeas — Heat-tolerant summer option for warm climates
Non-Legumes: The Organic Matter Builders
These don’t fix nitrogen, but they build organic matter fast. Use them alongside legumes or in rotation to improve structure.
- Buckwheat — Fast and smothering; great for suppressing weeds in summer
- Phacelia — Wildly efficient at adding biomass; decomposes quickly
- Rye (winter rye) — Excellent winter cover; adds huge amounts of carbon
- Mustard — Breaks down quickly and has natural biofumigant properties
- Oats — Fast-growing cool-season option; winter-kills in cold climates, saving you a dig
For a deeper dive into planning which crops to grow where and when, the Plant Selection Spectrum: A Tiered Crop Guide is a fantastic companion resource.
Timing the Cut-and-Dig for Maximum Nitrogen Release
This is where most beginners go wrong. Timing your cut is everything.
The ideal moment to chop and incorporate a green manure crop is just before — or right at — the start of flowering. Here’s why: at that stage, the plant has built up maximum nitrogen and nutrients in its leaves and stems. But it hasn’t yet shifted energy into seed production. The tissue is still soft, succulent, and easy for soil microbes to break down.
If you wait until the plant sets seed, two problems arise. First, you lose a significant portion of the nitrogen as the plant diverts it into seeds. Second, tough, fibrous stems take far longer to decompose, creating a temporary nitrogen drawdown as microbes work through the carbon-heavy material.
Cut early. Bury shallow. Most green manures only need to go 4–6 inches deep. Deeper burial slows decomposition because oxygen-loving microbes can’t do their job as efficiently.
After incorporating, wait 2–4 weeks before planting your main crop. This window lets the green matter decompose and stabilize, preventing any root competition or temporary nitrogen lock-up.
A Practical Green Manure Planting Calendar
You can work green manures into almost any growing season. Here’s a simple framework to follow.
Early Spring (March–April)
Sow field peas or crimson clover as soon as the ground is workable. These tolerate frost and establish quickly. Chop and dig in late April or May, 3–4 weeks before your summer crops go in.
Summer Gap (June–August)
Any time a bed sits empty for 4+ weeks, fill it with buckwheat. It germinates in warm soil within days and smothers weeds. Cut it at first flower — usually 30–40 days after sowing. Dig it in and plant fall crops 2 weeks later.
Late Summer Into Fall (August–September)
Sow hairy vetch or a vetch-rye mix after summer crops are cleared. These overwinter and can be chopped in early spring, delivering a huge nitrogen charge right before your first plantings.
Winter (October–February)
In cold climates, sow oats in early fall. They grow until frost and then winter-kill, leaving a mulch layer that protects soil and partially decomposes on its own. Come spring, a light dig is all you need.
Planning around microclimates can help you squeeze extra weeks out of each planting window. The guide on Climate-Proof Your Crops: A 30-Day Microclimate-Aware Planting Plan pairs perfectly with this seasonal approach.
How to Incorporate Green Manures Without a Tractor
You don’t need heavy equipment. For home garden beds, here’s the simple process:
- Cut plants at the base with a sharp hoe, scythe, or even strong shears.
- Chop the material roughly with a spade before digging — smaller pieces decompose faster.
- Dig it in to the top 4–6 inches of soil using a garden fork or spade.
- Water well if conditions are dry — moisture speeds decomposition.
- Wait 2–4 weeks, then plant your main crop.
Having reliable, well-maintained tools makes this process significantly easier. If your gear needs an upgrade, Tools That Grow with You: Durable Gear and Smart Maintenance has smart recommendations for every skill level.
Common Mistakes to Avoid
Even with a simple technique, a few errors can undermine your results.
- Waiting too long to cut. Seeding plants are much harder to incorporate and release less nitrogen.
- Digging too deep. Burying green matter below 6 inches slows decomposition significantly.
- Planting too soon after incorporating. Give the decomposition process at least 2 weeks. Impatience here will stunt your transplants.
- Skipping water. Dry soil kills the microbial activity that breaks down the green material.
- Only growing one type. Mix legumes with non-legumes for the best balance of nitrogen and organic matter.
Start This Season — Even in a Small Space
Green manure crops don’t require a large plot. Even a 4×8 raised bed can benefit enormously from a single round of crimson clover or buckwheat between crops. The cost is minimal — a small seed packet — and the payoff extends for multiple seasons as your soil biology strengthens.
Your grandparents’ generation understood something we’re just starting to rediscover: the most powerful soil amendments aren’t bought. They’re grown. Bury a few plants this season and watch what happens to everything that follows.
If you’re building a bigger picture of soil health and long-term garden planning, the Layered Learning: A Gardener’s Progressive System is a wonderful framework for putting all these skills together — season by season, layer by layer.
The soil is always hungry for organic matter. This season, grow it something real.