Nettle Slurry: The Forgotten Powerhouse Fertilizer
Your grandparents didn’t need a garden center. They didn’t need synthetic nitrogen or expensive liquid feeds. They had nettle slurry fertilizer – a potent, free, and almost completely forgotten plant tonic that European farmers have used for centuries. If you’ve ever cursed a patch of stinging nettles in your yard, this post is about to change your entire relationship with that plant.
Nettle slurry is one of the most nutrient-dense liquid fertilizers you can make at home. It costs nothing. It feeds your soil biology. And it works. Let’s dig into exactly how to make it, use it, and why it outperforms many of the bottled products lining nursery shelves.
What Is Nettle Slurry Fertilizer?
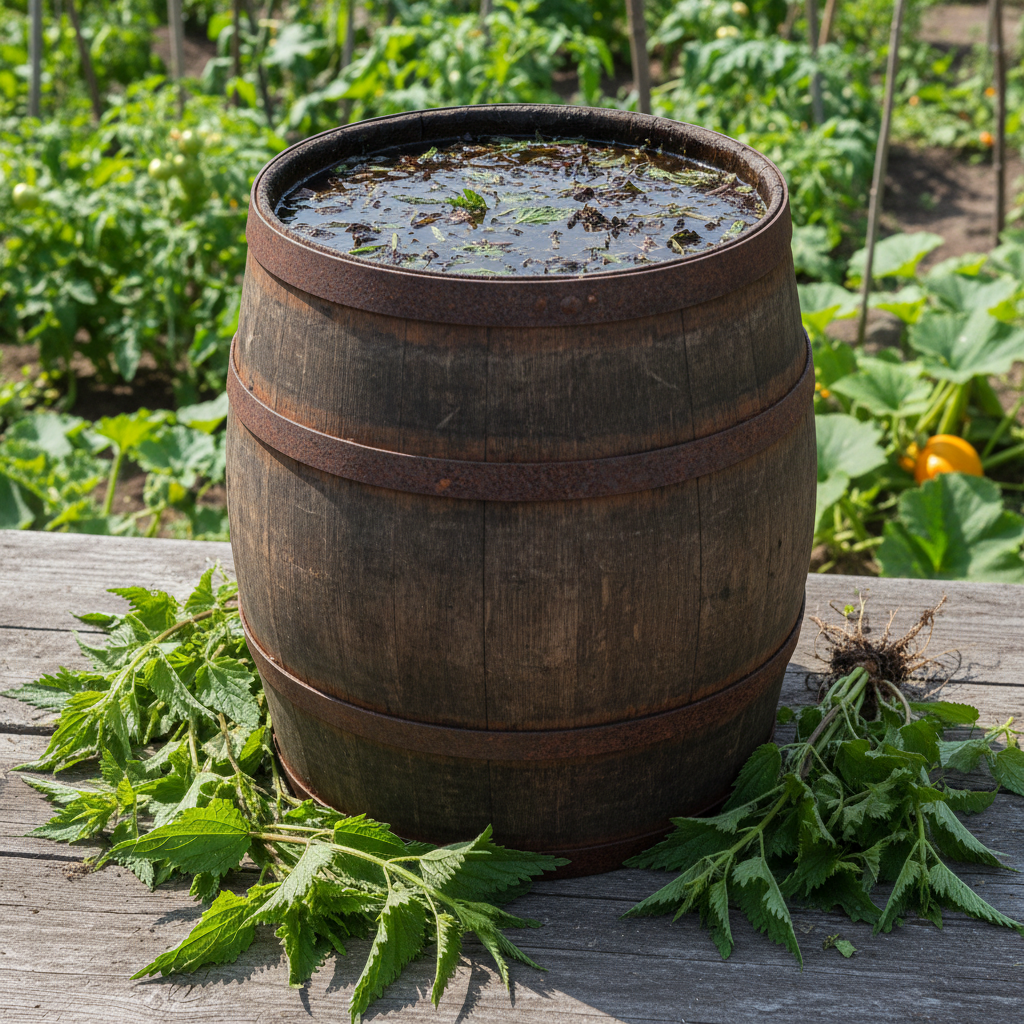
Nettle slurry is simply stinging nettles (Urtica dioica) soaked in water over several days or weeks until the plant matter breaks down and releases its nutrients into the liquid. The result is a rich, dark, somewhat pungent brew that acts as a fast-acting liquid feed for plants.
This technique was standard practice across rural Europe long before synthetic fertilizers existed. German and French gardeners called their version Brennnesseljauche and purin d’ortie respectively. Farmers used it on vegetables, fruit trees, and field crops. It wasn’t just tradition – it was effective agricultural science hiding in plain sight.
Today, most gardeners walk past nettles without a second thought. But once you understand what’s inside that stinging leaf, you’ll see a free fertilizer factory growing wild at the edge of your property.
Why Nettles Are So Incredibly Nutrient-Rich
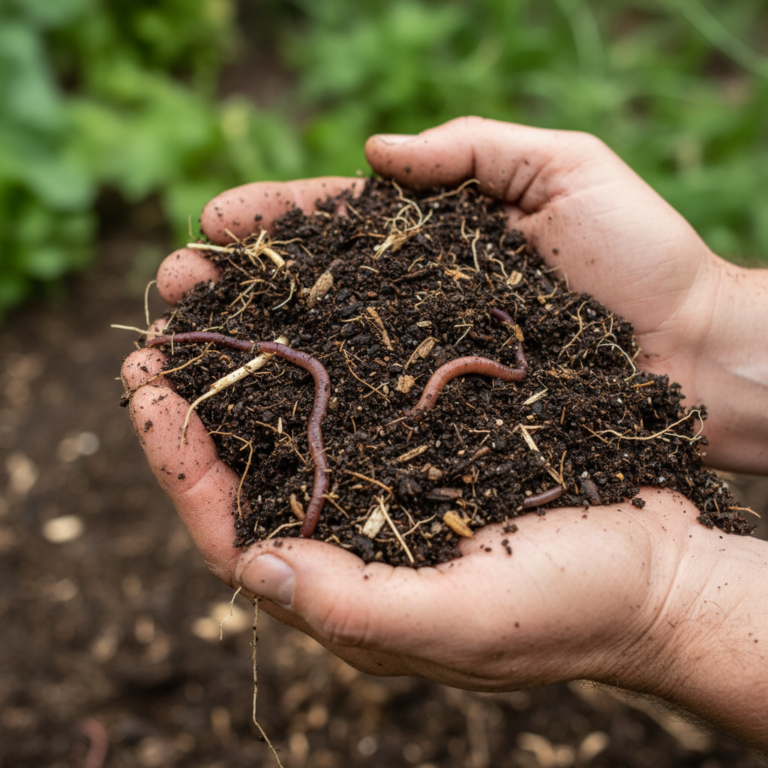
Stinging nettles are what soil scientists call dynamic accumulators. Their deep root systems mine minerals from the subsoil and concentrate them in the leaves. A patch of nettles growing in good ground is essentially a nutrient pump.
Here’s what nettles bring to the table:
- Nitrogen (N): Nettles are exceptionally high in nitrogen – the primary driver of lush, green plant growth.
- Iron: Critical for chlorophyll production and plant energy.
- Potassium: Supports flowering, fruiting, and disease resistance.
- Magnesium: Another chlorophyll builder, often deficient in garden soils.
- Calcium: Strengthens cell walls and helps prevent disorders like blossom end rot.
- Silica: Builds structural strength in stems and leaves.
When you steep nettles in water, all of these nutrients leach into the liquid. You then apply that mineral-rich tea directly to your plants and soil – feeding both the crop and the microbial life underneath it.
If you’re already working on understanding what’s happening beneath your feet, our guide to reading your soil without a lab kit pairs perfectly with this approach. Knowing your soil’s starting point helps you apply nettle slurry at exactly the right moment.
How to Make Nettle Slurry: Step-by-Step
Making nettle slurry is genuinely simple. You need nettles, water, a container, and patience. Here’s the process:
What You’ll Need
- A large bucket or barrel (5-20 gallons works well)
- Fresh stinging nettles – stems, leaves, and all
- Rainwater or non-chlorinated water (tap water left overnight works too)
- A stick for stirring
- A lid or breathable cover (to reduce smell and keep debris out)
- Gloves – wear them when harvesting and handling fresh nettles
The Process
Step 1: Harvest your nettles. Fill your container roughly one-third to half full with loosely packed fresh nettles. Harvest before they flower for the highest nitrogen content. Young spring growth is ideal.
Step 2: Add water. Cover the nettles completely with water. Leave a few inches at the top since the mixture will expand slightly as it ferments.
Step 3: Wait and stir. Cover loosely. Stir every couple of days. At warm temperatures (above 60°F), the brew will be ready in 7-14 days. In cooler conditions, allow up to 3-4 weeks. You’ll know it’s ready when the liquid turns dark brown and the plant matter is largely broken down.
Step 4: Strain it. Pour the liquid through old fabric, mesh, or a sieve into another container. Compost the remaining plant pulp – it’s still full of goodness for your compost heap.
Step 5: Dilute before use. This is crucial. Nettle slurry is concentrated. Dilute it at roughly 1 part slurry to 10 parts water for a soil drench. Use a 1:20 ratio for a foliar spray on leaves. Undiluted slurry can burn plants.
A Word About the Smell
Nettle slurry smells. There’s no polite way around it. The fermentation process produces ammonia and sulfur compounds that will remind you of a barnyard on a warm afternoon. Keep your barrel away from doors and windows. Diluting before use reduces the odor significantly. Some gardeners add a small handful of valerian herb or a few drops of lavender essential oil to the brew to help – though this is entirely optional.
The smell is also a sign the brew is working. Fermentation is releasing those locked-up nutrients. Embrace it.
How and When to Apply Nettle Slurry Fertilizer
Nettle slurry fertilizer works best as a regular feeding during the active growing season. Here’s a simple application guide:
For Vegetables and Annual Crops
Apply as a soil drench (1:10 dilution) every 2-3 weeks during the growing season. Heavy feeders like tomatoes, courgettes, brassicas, and corn love it. Apply at the base of plants, not directly on foliage at this concentration.
For Seedlings
Use a weaker dilution – around 1:20 – to avoid shocking tender young plants. Apply once a week during the first month after transplanting.
As a Foliar Spray
Diluted to 1:20, nettle slurry makes a fast-acting foliar feed. Spray in the early morning or evening to avoid leaf scorch. This method gets nutrients into the plant within hours. It also appears to have some mild pest-deterrent properties, though this is more anecdotal than scientifically proven.
To Activate Compost
Pour undiluted slurry directly onto a slow compost pile. The nitrogen and microbial activity jumpstart decomposition quickly. This is one of the best uses for the older, stronger batches of nettle brew.
If you’re experimenting with different feeding approaches across your beds, consider logging your results. Our garden tracking templates make it easy to compare which plants responded best and when.
Nettle Slurry vs. Synthetic Fertilizers: The Real Difference
A bag of synthetic nitrogen fertilizer delivers a fast hit of available nitrogen and then it’s gone. It can disrupt soil pH, harm earthworms, and leach quickly into groundwater. Over time, it trains plants to be dependent on external feeding rather than building a relationship with the soil food web.
Nettle slurry fertilizer works differently. Yes, it delivers available nitrogen quickly – but it also feeds the microbial community in your soil. Those microbes then make more nutrients available from the soil itself. You’re building capacity, not just providing a short-term fix.
Think of synthetic fertilizers as giving your plants fast food. Nettle slurry is more like a wholesome meal that also improves the kitchen for next time.
Pairing this approach with good microclimate management can dramatically amplify your results. Read how to map your garden’s microclimates to place your heaviest feeders where conditions – and your nettle applications – will have the most impact.
Where to Find Nettles (And What to Do If You Don’t Have Any)
Stinging nettles grow wild across most of North America, Europe, and parts of Asia. Look for them in disturbed soils, near waterways, around old compost heaps, and at field edges. They often indicate nitrogen-rich ground – which makes sense given how efficiently they absorb it.
If nettles don’t grow locally, you can actually grow your own from seed. They establish quickly and can be harvested multiple times per season. A small corner of your garden devoted to nettles will give you a season-long fertilizer supply – plus edible young shoots in spring that are nutritious in soups and teas.
For those building a more self-sufficient, productive garden from the ground up, exploring organic growing supplies and herb seeds can help you get nettles and other dynamic accumulator plants established quickly alongside your food crops.
Other Plants You Can Brew the Same Way
Once you understand the nettle slurry method, you can apply it to other plants too. Comfrey makes an excellent high-potassium brew – fantastic for fruiting plants. Yarrow, chamomile, and horsetail all produce useful liquid fertilizers through the same fermentation process. Each brings its own nutrient profile to the mix.
Some gardeners blend nettles and comfrey together for a balanced all-round feed. Experiment and take notes – what works best in your soil and climate might be different from someone across the country.
Start Small, Learn Fast
You don’t need to overhaul your entire garden approach overnight. Start with one small bucket of nettle slurry. Apply it to a few tomato plants or a hungry bed of greens. Watch what happens over the following two weeks. Compare those plants to unfed neighbors.
That’s the old way of learning – observation, patience, and iteration. It’s also the most reliable way to build real gardening knowledge that sticks. If you’re just finding your feet in the garden, our 4-week beginner skill-build plan gives you a gentle, structured way to layer in practices like this without overwhelm.
Your ancestors didn’t have instruction manuals. They had curiosity, observation, and plants like the humble stinging nettle. The wisdom was never lost – it was just waiting for someone to pick it back up.
Now go find yourself some nettles. And wear the gloves.